Monday, December 29, 2014

Managing Related Items with the SharePoint REST API

Technorati Tags: ,,,

The “Related Items” column was introduced in SharePoint 2013. It is a site column that is part of the Task content type. The column allows you to link other items to a given task. For example if you are doing an invoice approval workflow you may want to link an image of the invoice to the workflow task. The “Related Items” site column is not available to be added to other content types since it is by default part of the “_Hidden” site column group. Of course you can easily change this as explained in this link Enable Related Items Column allowing you to use it with other content types. The “Related Items” column is not visible in the new or edit form. It can only be accessed in the view form. This is probably due to the fact that the “Related Items” column has an “Invalid” field type and cannot be modified through traditional remote API list item methods. In this post I will show you how to do basic CRUD operations on the related items of a task item using the SharePoint REST API. The code samples are using the HttpClient with managed code. I was going to use JavaScript but the SharePoint Remote API exposes only static methods for these operations which unfortunately cannot be called across domains.   As you read through the post you will be surprised by some of the quirks of the API and what to watch out for.


First get Authenticated

All the code examples for managing related items must send a form digest value. The code below shows an example to get this value via the REST API. You could also factor out all of the code for creating the HttpClient object and send this in as a parameter to all the examples.

public string GetDigest()
{
string url = "http://servername/";
HttpClient client = new HttpClient(new HttpClientHandler() { UseDefaultCredentials = true });
client.BaseAddress = new System.Uri(url);
string retVal = null;
string cmd = "_api/contextinfo";
client.DefaultRequestHeaders.Add("Accept", "application/json;odata=verbose");
client.DefaultRequestHeaders.Add("ContentType", "application/json");
client.DefaultRequestHeaders.Add("ContentLength", "0");

try
{
var response = client.PostAsJsonAsync(cmd, "").Result;

if (response.IsSuccessStatusCode)
{
try
{
string content = response.Content.ReadAsStringAsync().Result;
var jss = new JavaScriptSerializer();
var val = jss.Deserialize>(content);
var d = val["d"] as Dictionary;
var wi = d["GetContextWebInformation"] as Dictionary;
retVal = wi["FormDigestValue"].ToString();

}
catch (Exception ex1)
{
System.Diagnostics.Debug.WriteLine(ex1.Message);

}

}

}
catch (Exception ex)
{
System.Diagnostics.Debug.WriteLine(ex.Message);
}

return retVal;
}

Get a Task’s Related Items


The code below shows how to retrieve the related items for a given task. All of the methods for the SP.RelatedItemManager class are static. Static methods must be called by appending the method name to the class name with a “.” (period) rather than a forward slash. The GetRelatedItems method takes two parameters. The first parameter is the SourceListName. This can be either the name (title) of the list or the ID (GUID) of the list. The code will run faster if you send in a string representing the ID (GUID). The second parameter is the SourceItemID. This is the integer value of the task item’s ID. The server code assumes the source list is in the current web you are making the call from. The method also will return a maximum of 9 related items.

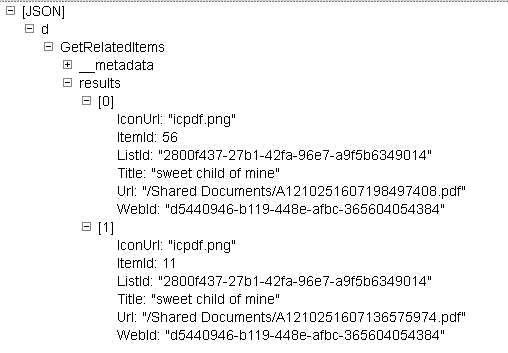
public async void GetRelatedItems(string digest)
{

string url = "http://servername";
HttpClient client = new HttpClient(new HttpClientHandler() { UseDefaultCredentials = true });
client.BaseAddress = new System.Uri(url);
client.DefaultRequestHeaders.Clear();
client.DefaultRequestHeaders.Add("Accept", "application/json;odata=verbose");
client.DefaultRequestHeaders.Add("X-RequestDigest", digest);
client.DefaultRequestHeaders.Add("X-HTTP-Method", "POST");

string json = "{'SourceListName': 'POCreation','SourceItemID': 2}";
client.DefaultRequestHeaders.Add("ContentLength", json.Length.ToString());
try
{
StringContent strContent = new StringContent(json);
strContent.Headers.ContentType = MediaTypeHeaderValue.Parse("application/json;odata=verbose");
HttpResponseMessage response = await client.PostAsync("_api/SP.RelatedItemManager.GetRelatedItems", strContent);

response.EnsureSuccessStatusCode();
if (response.IsSuccessStatusCode)
{
var content = response.Content.ReadAsStringAsync();
}
else
{
var content = response.Content.ReadAsStringAsync();
}
}
catch (Exception ex)
{
System.Diagnostics.Debug.WriteLine(ex.Message);
}

}
Below is an example of the json response. You can get this json from the response.Content.Result property. The result can be parsed using the Newtonsoft.Json assembly.

Adding a Related Item


When adding a related item to an existing task the API can be confusing. The AddSingleLinkToUrl method takes 4 parameters, SourceListName, SourceItemID, TargetItemUrl, and TryAddReverseLink.  Since I had started experimenting with the AddSingleLinkToUrl first I assumed the source parameters would be the list where the related item was coming from and the target parameters represented the task list I was working with. But of course it is the opposite. Just like in the GetRelatedItems method you can use either the list name or ID (GUID) for the SourceListName. The SourceItemID is the ID of the task list item. The TargetItemUrl is the server relative URL of the item you are adding as a related item. In the code below I am using a document from the Shared Documents library. The final parameter TryAddReverseLink is very interesting and this value is set to true when adding related items using the SharePoint UI. When you set this to true the server side code will check to see if the target list also has a “Related Items” field. If it does then the code will add a json value of the source task item to the target item’s “Related Items” field, thus creating a link between the two items. This does not raise an error if the target list does not have a “Related Items” field. Finally, a few things to be aware of. You will receive an error if the target URL is the URL to the task item itself. So you cannot relate to yourself. Secondly, if the source item already has 9 related items then the server code will try and remove any of the 9 that no longer exist and then add the one your adding. If it cannot remove any of the existing 9 an error is returned.

public async void AddRelatedItem(string digest)
{
string url = "http://servername/";
HttpClient client = new HttpClient(new HttpClientHandler() { UseDefaultCredentials = true });
client.BaseAddress = new System.Uri(url);
client.DefaultRequestHeaders.Clear();
client.DefaultRequestHeaders.Add("Accept", "application/json;odata=verbose");
client.DefaultRequestHeaders.Add("X-RequestDigest", digest);
client.DefaultRequestHeaders.Add("X-HTTP-Method", "POST");

string json = "{'SourceListName':'POCreation','SourceItemID':2,'TargetItemUrl':'/Shared Documents/A1210251607175080419.pdf','TryAddReverseLink':true}";
client.DefaultRequestHeaders.Add("ContentLength", json.Length.ToString());
try
{
StringContent strContent = new StringContent(json);
strContent.Headers.ContentType = MediaTypeHeaderValue.Parse("application/json;odata=verbose");
HttpResponseMessage response = await client.PostAsync("_api/SP.RelatedItemManager.AddSingleLinkToUrl", strContent);


response.EnsureSuccessStatusCode();
if (response.IsSuccessStatusCode)
{
var content = response.Content.ReadAsStringAsync();
}
else
{
var content = response.Content.ReadAsStringAsync();
}
}
catch (Exception ex)
{
System.Diagnostics.Debug.WriteLine(ex.Message);
}

}

Removing a Related Item


The DeleteSingleLink method API has 7 parameters. It is more complicated versus adding a related item. Once again you have the SourceListName and SourceItemID parameters. But now you have two more parameters SourceWebUrl and TargetWebUrl.  These can be null if both webs are in the same web where the call is being made. If not then they can be set to either an absolute or relative URL. This method also requires the TargetListName and TargetItemID parameters which are handled the same way as the source parameters. The final parameter will try and remove the reverse link that may have been created when you added the related item. So it is good idea to set this to true since you do not want to leave any dead end relationships.

public async void DeleteRelatedItem(string digest)
{
string url = "http://servername/";
HttpClient client = new HttpClient(new HttpClientHandler() { UseDefaultCredentials = true });
client.BaseAddress = new System.Uri(url);
client.DefaultRequestHeaders.Clear();
client.DefaultRequestHeaders.Add("Accept", "application/json;odata=verbose");
client.DefaultRequestHeaders.Add("X-RequestDigest", digest);
client.DefaultRequestHeaders.Add("X-HTTP-Method", "POST");

string json = "{'SourceListName':'POCreation','SourceItemID':2,'SourceWebUrl':null,'TargetListName':'Documents','TargetItemID':36,'TargetWebUrl':null,'TryDeleteReverseLink':true}";

client.DefaultRequestHeaders.Add("ContentLength", json.Length.ToString());
try
{
StringContent strContent = new StringContent(json);
strContent.Headers.ContentType = MediaTypeHeaderValue.Parse("application/json;odata=verbose");
HttpResponseMessage response = await client.PostAsync("_api/SP.RelatedItemManager.DeleteSingleLink", strContent);


response.EnsureSuccessStatusCode();
if (response.IsSuccessStatusCode)
{
var content = response.Content.ReadAsStringAsync();
}
else
{
var content = response.Content.ReadAsStringAsync();
}
}
catch (Exception ex)
{
System.Diagnostics.Debug.WriteLine(ex.Message);
}

}

Building Better Relationships


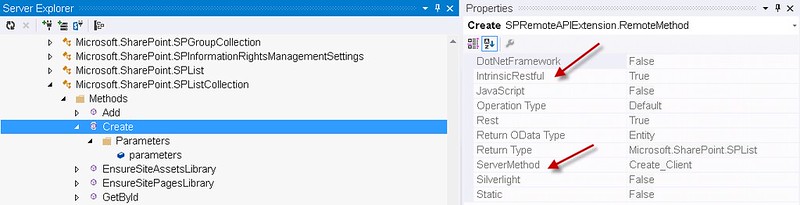
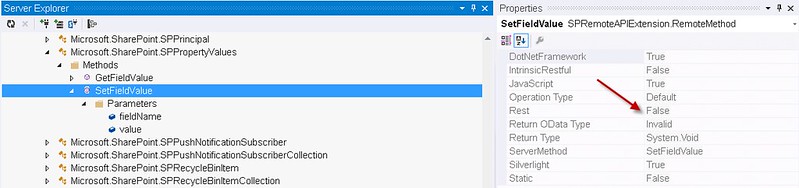
There are other methods available on the SP.RelatedItemManager class such as GetPageOneRealtedItems. This basically is the same as calling the GetRelatedItems method but only returns the first 4 items. This method is used from the SharePoint UI. The UI will then call GetRelatedItems when you click the “Show More” link. Another available method similar to AddSingleLinkToUrl is AddSingleLinkFromUrl. The difference between the two is the assumption of which SPWeb you are making the call from. AddSingleLinkToUrl assumes the current web is the web where the source list is located, and the AddSingleLinkFromUrl method assumes the current web is the web where the target list is located. So depending where you are making the call from determines which method to call. It is possible to create a context menu item allowing users to make a document a related item of task. If you are not sure where the code will be hosted you can just use the AddSingleLink method. Similar to the DeleteSingleLink method you must supply more parameters which include the web ids of both the source and target. This allows the server code to relate items across webs. If you want more information on these methods then I recommend you get the SPRemoteAPIExplorer Visual Studio extension.


Are these relationships useful? I think so. It allows users to tie together task items with relevant documents located somewhere else. It decouples task data from documents allowing for different projects/tasks to work with the same documents. It may possibly be used by Microsoft’s new Delve to relate items. You can retrieve the related items value in search results by mapping the ows_relateditems crawled property to a managed property. The value is stored in json format. You could search the managed property for an item by using the value “ItemID:20”. This would return all items that are related to an item with a list item ID of 20. But to be exact you would have to search for “{ItemId:20”, “WebId:”d2a04afc-9a05-48c8-a7fa-fa98f9496141”,”ListId”:”e5a04afc-9a05-48c8-a7fa-fa98f9496897”}”. This would be difficult for end users.


I hope you found this post useful. Knowing how to relate items programmatically can make your workflows much more powerful.  There is still much more to be discovered in the SharePoint Remote API, and there is still much more improvement needed.

Wednesday, October 29, 2014

Easy SharePoint App Model Deployment for Web Developers (SPFastDeploy 3.5)

Technorati Tags: ,,,

In March of this year I added support to the SPFastDeploy Visual Studio extension to deploy a file to SharePoint when saving.  SPFastDeploy 3.0 This turned out to be a popular feature. It also supported deploying the JavaScript files generated by the Typescript compiler when saving a Typescript file. In this blog post I will show you where I have added the same support for CoffeeScript and LESS generated files. I have also added support for the Web Essentials minifying on save feature. Finally I will explain the support for deployng linked files in your solution and some minor bug fixes.

SPFastDeploy 3.5 

CoffeeScript and LESS Support

The Visual Studio Web Essentials extension adds many web development tools. These include Typescript, CoffeeScript and LESS languages. These tools compile the code and generate the related  JavaScript and CSS files. SPFastDeploy 3.0 supported deploying the related JavaScript file for Typescript. Version 3.5 supports now supports deploying the related files when saving CoffeeScript and LESS files. The SPFastDeploy extension options have been expanded to include options for each supported language. The category options gives you the ability to define the amount of time to wait and look for the generated related file before timing out. In addition SPFastDeploy  supports Web Essentials ability to minify on save. So if you have generated a minified JavaScript or CSS file and have the Web Essentials feature enabled, then SPFastDeploy will look for the related minified version of the related file. Please note it is up to you to have the minified file generated in the same folder as the corresponding non-minified file. SPFastDeploy only looks for the minified file and does not generate it.

Minify Support

SPFastDeploy 3.5 supports deploying auto minified JavaScript and CSS files not generated by compilers. So if you are just editing and saving JavaScript and CSS files then SPFastDeploy will deploy the minified related file when saving your changes. You will see two new options one for JavaScript and one for CSS. Once again it is up to you generate the minified file in the same folder using Web Essentials. Please note that if you save the file and no changes have been made, then Web Essentials will not generate a new minified file and SPFastDeploy will time out waiting for the new minified file.

Linked File Support

Since Visual Studio 2010 you can add an existing file to a solution by adding a link to that file from another location or solution. SPFastDeploy now supports deploying these types of files when saving from SharePoint app model solutions. Linked files are denoted by the shortcut icon.

Bug Fixes

SPFastDeploy 3.5 fixes the bug where you have loaded a JavaScript or CSS file from outside the project and then save it with the “Deploy On Save” option turned on and Visual Studio crashes. This version also fixes the bug where if you change the Site URL property of the SharePoint app project, then SPFastDeploy is not aware of the change and continues to deploy it to the previous Site URL. Previously you had to restart Visual Studio before SPFastDeploy would pick up the change.

Be More Productive with Web Essentials and SPFastDeploy 3.5

Deploying your changes to a SharePoint App automatically when saving makes SharePoint App Model development easy. Now with SPFastDeploy 3.5 you can take this time saving feature and combine it with the web development tools from Web Essentials saving even more time. If you want support for other web development languages such as SWEET.js or SASS then please put your request in at the SPFastDeploy Q/A section of the Visual Studio extensions home page.

Wednesday, September 17, 2014

Sharing Documents with the SharePoint REST API

Technorati Tags: ,,

Sharing documents is a pretty basic thing in SharePoint. Most  everyone is familiar with the callout action “Share” which enables you to share a document with other people. It is a mainstay of collaboration when working with documents in a team.

However, there is very little documentation on how to do this through the remote API of SharePoint. In this post I will show how you can do this using the REST API and JavaScript. The call has many arguments which can be confusing. The best description I have found for the UpdateDocumentSharingInformation method is here API Description.  Just remember when you are sharing a document you are granting permissions. If you want to use this REST API method in a SharePoint app, then make sure you grant the “Web Manage” permissions in your app manifest. When you click the Share action you are presented a dialog to grant either view or edit permissions to multiple users or roles.

The Code

Below is the REST call using  JavaScript code that shares a document from a SharePoint hosted app.

function shareDocument()
{
var hostweburl = decodeURIComponent(getQueryStringParameter('SPHostUrl'));
var appweburl = decodeURIComponent(getQueryStringParameter('SPAppWebUrl'));
var restSource = appweburl + "/_api/SP.Sharing.DocumentSharingManager.UpdateDocumentSharingInfo";


$.ajax(
{
'url': restSource,
'method': 'POST',
'data': JSON.stringify({
'resourceAddress': 'http://basesmc15/Shared%20Documents/A1210251607172880165.pdf',
'userRoleAssignments': [{
'__metadata': {
'type': 'SP.Sharing.UserRoleAssignment'
},
'Role': 1,
'UserId': 'Chris Tester'
}],
'validateExistingPermissions': false,
'additiveMode': true,
'sendServerManagedNotification': false,
'customMessage': "Please look at the following document",
'includeAnonymousLinksInNotification': false
}),
'headers': {
'accept': 'application/json;odata=verbose',
'content-type': 'application/json;odata=verbose',
'X-RequestDigest': $('#__REQUESTDIGEST').val()
},
'success': function (data) {
var d = data;
},
'error': function (err) {
alert(JSON.stringify(err));
}
}
);

}

The Parameters


ResourceAddress: This is the full URL to the document you want to share


UserRoleAssignments: This an array of users and roles that you want to share the document with. The Role property represents which permission you are assigning. 1 =  View, 2 =  Edit, 3 = Owner, 0 = None. The UserId property can be the name of the user or a role.  For example, if you wanted to share the document with the “Translation Mangers” role and the “Steve Tester” user you would use this JSON:

'userRoleAssignments': [{
'__metadata': {
'type': 'SP.Sharing.UserRoleAssignment'
},
'Role': 1,
'UserId': 'Translation Managers'
},
{
'__metadata': {
'type': 'SP.Sharing.UserRoleAssignment'
},
'Role': 1,
'UserId': 'Steve Tester'
}]

ValidateExistingPermissions: A flag indicating how to honor a requested permission for a user. If this value is "true", SharePoint will not grant the requested permission if a user already has sufficient permissions, and if this value is "false", then SharePoint  will grant the requested permission whether or not a user already has the same or more permissions. This parameter only applies when the additiveMode  parameter is set to true.


AdditiveMode:A flag indicating whether the permission setting uses the additive or strict mode. If this value is "true", the permission setting uses the additive mode, which means that the specified permission will be added to the user’s current list of permissions if it is not there already, and if this value is "false", the permission setting uses the strict mode, which means that the specified permission will replace the user’s current permissions. This parameter is useful when you want to stop sharing a document with a person or group. In this case you would set AdditiveMode to false using the Role = 0.


SendServerManagedNotification: A  flag to indicate whether or not to generate an email notification to each recipient in the userRoleAssignments array after the document update is completed successfully. If this value is "true", then SharePoint will send an email notification if an email server is configured, and if the value is "false", no email notification will be sent.


CustomMessage: A custom message to be sent in the body of the email.


IncludeAnonymousLinksInNotification: A flag that indicates whether or not to include anonymous access links in the email notification to each recipient in the userRoleAssignments array after the document update is completed successfully. If the value is "true", the SharePoint will include an anonymous access link in the email notification, and if the value is "false", no link will be included. This is useful if you are sharing the document with an external user. You must be running this code with full control or as a Site Owner if you want to share the document with external users.


The Results


After calling the above code you will receive a result for every user or role you have shared the document with. The code does not return an error and you must examine the results to determine success. Check the Status property. If this is false typically there will be a message in the Message property explaining the problem. It also tells you whether the user is known. If the user is not known then it is considered an external user.


Resting and Sharing


As you can see there is a lot more to sharing a document versus what is presented in the SharePoint UI. The UpdateDocumentSharingInfo method has many options. You can use this in your custom SharePoint apps to build more robust sharing of documents which could include the option of a custom email message or bulk sharing of documents. This could also be used to stop sharing a document. I have yet to find an easy way to stop sharing a document using the SharePoint UI.

Sunday, August 24, 2014

Using the HttpClient Class with SharePoint 2013 REST API

Technorati Tags: ,

The System.Net.Http.HttpClient class is new in .Net framework 4.5 and was introduced under the ASP.Net Web API. The class and has many methods that support asynchronous programming and  is the best choice for writing client apps that make HTTP requests. Compared to the traditional System.Net.HttpWebRequest class not only does the HttpClient class have more options it also has extension methods such as PostAsJsonAsync and PostAsXmlAsync  methods which are available in System.Net.Http.Formatting assembly shipped with ASP.Net MVC 4 framework. In this post I am going to give you a tip on how to successfully post to the SharePoint REST API using the HttpClient class. There are many examples on how to post to the SharePoint REST API using the HttpWebRequest class but hardly any using the HttpClient class. If you are not careful you would think that the HttpClient class did not work with the SharePoint REST API.

I Keep Getting a 400 Bad Request Message when Posting

Below is a small example on how to use the HttpClient to create a folder in SharePoint 2013. The key to success is setting the Content-Type header correctly when posting. If you have used the REST API you know you must set the Content-Type header to “application/json; odata=verbose”. If you don’t you will get a “400 Bad Request” error. You can use the HttpClient.DefaultRequestHeaders collection to add headers but when trying to add the “Content-Type” header the collection will throw an “InvalidOperationException” with this message “{"Misused header name. Make sure request headers are used with HttpRequestMessage, response headers with HttpResponseMessage, and content headers with HttpContent objects."}”. So ok I must not be setting the content-type correctly on the HttpContent object. The StringContent class is what you are supposed to use as an argument when calling the HttpClient.PostAsync method. Looking at the StringContent class your first inclination is to use the constructor and give it the json that you want to post. The constructor takes the json, encoding type and media type as arguments. The media type corresponds to the content-type.

StringContent strContent = new StringContent(json, System.Text.Encoding.UTF8, "application/json;odata=verbose");

Unfortunately sending “application/json;odata=verbose” as the media type argument causes a “FormatException” with the message {"The format of value 'application/json;odata=verbose' is invalid."}. If you just use “application/json” you will receive a “400 bad request” error because the “odata=verbose” is missing.  So how do you get around this. First of all you must create the StringContent object with the json as the only argument to the constructor and then set the StringContent.Headers.ContentType property to “application/json;odata=verbose” using the MediaTypeHeaderValue.Parse method.

StringContent strContent = new StringContent(json);               
strContent.Headers.ContentType = MediaTypeHeaderValue.Parse("application/json;odata=verbose");

Mystery solved.

private void CreateFolder(HttpClient client, string digest)
{
client.DefaultRequestHeaders.Clear();
client.DefaultRequestHeaders.Add("Accept", "application/json;odata=verbose");
client.DefaultRequestHeaders.Add("X-RequestDigest", digest);
client.DefaultRequestHeaders.Add("X-HTTP-Method", "POST");

string json = "{'__metadata': { 'type': 'SP.Folder' }, 'ServerRelativeUrl': '/shared documents/folderhttp1'}";
client.DefaultRequestHeaders.Add("ContentLength", json.Length.ToString());
try
{
StringContent strContent = new StringContent(json);
strContent.Headers.ContentType = MediaTypeHeaderValue.Parse("application/json;odata=verbose");
HttpResponseMessage response = client.PostAsync("_api/web/folders", strContent).Result;

response.EnsureSuccessStatusCode();
if (response.IsSuccessStatusCode)
{
var content = response.Content.ReadAsStringAsync();
}
else
{
var content = response.Content.ReadAsStringAsync();
}
}
catch (Exception ex)
{
System.Diagnostics.Debug.WriteLine(ex.Message);
}

}

HttpClient is Here


HttpClient is a modern HTTP client for .NET. It provides a flexible and extensible API for accessing all things exposed through HTTP. You should use it instead of the HttpWebRequest. You can read more about it here System.Net.Http. Another great source of information when using the HttpClient with SharePoint REST is Dennis RedField’s blog Cloud 2013 or Bust. This blog has an in depth 4 part series on how to use the HttpClient with SharePoint REST. Changing our habits as developers can be a slow process. However, some new APIs can be confusing especially when used against SharePoint 2013. SharePoint 2013 is not fully OData compliant yet and has some quirks, namely content-type checking.  I hope this tip can save you some time.

Thursday, July 31, 2014

Uploading Large Documents into SharePoint Online with REST,CSOM, and RPC using C#

Technorati Tags: ,,

There are many articles that give great examples on how to upload documents to SharePoint Online using jQuery and REST. These are useful to get around the message size limitation of use CSOM/JSOM when uploading documents. This message size limitation is not configurable in SharePoint Online. There are few examples on how to upload large documents using C#. In this blog post I will show you how to use C# and the SharePoint REST, Managed CSOM and RPC to upload large documents (up to 2GB) to SharePoint Online. There are a few things you need to take care of to get all these  to work with SharePoint Online.

Credentials and Cookie Containers

In the code examples below both REST and RPC use the HttpWebRequest class to communicate with SharePoint. When using this class from C# you must set the Credentials and the CookieContainer properties of the HttpWebRequest object. The following helper methods creates the Microsoft.SharePoint.Client.SharePointOnlineCredentials and gets the System.Net.CookieContainer for the SharePointOnlineCredentials.

public static class Utils
{

public static CookieContainer GetO365CookieContainer(SharePointOnlineCredentials credentials, string targetSiteUrl)
{

Uri targetSite = new Uri(targetSiteUrl);
string cookieString = credentials.GetAuthenticationCookie(targetSite);
CookieContainer container = new CookieContainer();
string trimmedCookie = cookieString.TrimStart("SPOIDCRL=".ToCharArray());
container.Add(new Cookie("FedAuth", trimmedCookie, string.Empty, targetSite.Authority));
return container;


}

public static SharePointOnlineCredentials GetO365Credentials(string userName, string passWord)
{
SecureString securePassWord = new SecureString();
foreach (char c in passWord.ToCharArray()) securePassWord.AppendChar(c);
SharePointOnlineCredentials credentials = new SharePointOnlineCredentials(userName, securePassWord);
return credentials;
}


}

Uploading Large Documents With REST


The following code takes the site URL, document library title, and a file path to a local file and adds the file to the root folder collection of the site. If you want to use folders you can modify this code to handle it. The REST call requires a form digest value to be set so I have included the code that makes a REST call to the contextinfo to get it. Please make sure to set the time out on the HttpWebRequest to about 10 minutes because large files will exceed the default time out of 100 seconds. 10 minutes should be adequate to cover the unpredictable upload speeds of ISP’s and SharePoint Online.

public static void UploadRest(string siteUrl, string libraryName, string filePath)
{
byte[] binary = IO.File.ReadAllBytes(filePath); ;
string fname = IO.Path.GetFileName(filePath);
string result = string.Empty;
string resourceUrl = siteUrl + "/_api/web/lists/getbytitle('" + libraryName + "')/rootfolder/files/add(url='" + fname + "',overwrite=true)";

HttpWebRequest wreq = HttpWebRequest.Create(resourceUrl) as HttpWebRequest;
wreq.UseDefaultCredentials = false;
SharePointOnlineCredentials credentials = Utils.GetO365Credentials("your login", "your password");
wreq.Credentials = credentials;
wreq.CookieContainer = Utils.GetO365CookieContainer(credentials, siteUrl);

string formDigest = GetFormDigest(siteUrl, credentials, wreq.CookieContainer);
wreq.Headers.Add("X-RequestDigest", formDigest);
wreq.Method = "POST";
wreq.Timeout = 1000000;
wreq.Accept = "application/json; odata=verbose";
wreq.ContentLength = binary.Length;


using (IO.Stream requestStream = wreq.GetRequestStream())
{
requestStream.Write(binary, 0, binary.Length);
}

WebResponse wresp = wreq.GetResponse();
using (IO.StreamReader sr = new IO.StreamReader(wresp.GetResponseStream()))
{
result = sr.ReadToEnd();
}


}
public static string GetFormDigest(string siteUrl, ICredentials credentials, CookieContainer cc)
{
string formDigest = null;

string resourceUrl = siteUrl +"/_api/contextinfo";
HttpWebRequest wreq = HttpWebRequest.Create(resourceUrl) as HttpWebRequest;

wreq.Credentials = credentials;
wreq.CookieContainer = cc;
wreq.Method = "POST";
wreq.Accept = "application/json;odata=verbose";
wreq.ContentLength = 0;
wreq.ContentType = "application/json";
string result;
WebResponse wresp = wreq.GetResponse();

using (IO.StreamReader sr = new IO.StreamReader(wresp.GetResponseStream()))
{
result = sr.ReadToEnd();
}

var jss = new JavaScriptSerializer();
var val = jss.Deserialize>(result);
var d = val["d"] as Dictionary;
var wi = d["GetContextWebInformation"] as Dictionary;
formDigest = wi["FormDigestValue"].ToString();

return formDigest;

}

Uploading Large Documents with CSOM


At one time I thought you could not do this with CSOM, however fellow MVP Joris Poelmans brought to my attention that the AMS sample Core.LargeFileUpload was able to upload over 3 mb files O365 Development Patterns and Practices. This can only be done if you are setting the FileCreationInfo ContentStream property with an open stream to the file. This gets around the message size limit of CSOM because the ContentStream is using the MTOM optimizations and sending the raw binary rather than a base64 encoded binary. This is much more efficient and is faster that the other methods. This appears to be a later change in CSOM and optimized for SharePoint Online. The CSOM code does not need a cookie container. I also tried using File.SaveBinaryDirect method but I received “Cannot Invoke HTTP Dav Request” since this is not supported in SharePoint Online.

 public static void UploadDocumentContentStream(string siteUrl, string libraryName, string filePath)
{
ClientContext ctx = new ClientContext(siteUrl);
ctx.RequestTimeout = 1000000;
ctx.Credentials = Utils.GetO365Credentials("your login", "your password");
Web web = ctx.Web;

using (IO.FileStream fs = new IO.FileStream(filePath, IO.FileMode.Open))
{
FileCreationInformation flciNewFile = new FileCreationInformation();

// This is the key difference for the first case - using ContentStream property
flciNewFile.ContentStream = fs;
flciNewFile.Url = IO.Path.GetFileName(filePath);
flciNewFile.Overwrite = true;


List docs = web.Lists.GetByTitle(libraryName);
Microsoft.SharePoint.Client.File uploadFile = docs.RootFolder.Files.Add(flciNewFile);

ctx.Load(uploadFile);
ctx.ExecuteQuery();
}
}

Uploading Large Documents with RPC


RPC still lives and is supported in SharePoint Online. The code below is simplified. RPC can be hard to understand because the syntax for the different parameters is from years ago. RPC is basically an HTTP POST to C++ dll. It can be fast but it was not faster than CSOM.  The parameters and binary must be combined and separated by a line feed into one common byte array before posting. The libraryName parameter cannot be the title of document library but the actual URL for it. Instead of Documents you must use Shared Documents. You will note many of the parameters are URL Encoded because RPC is very particular about characters in the URL. Finally, note that the code feeds the byte array to the request stream in chunks. This helps prevent triggering of SharePoint Online throttling limits.

 public static void UploadDocumentRPC(string siteUrl, string libraryName, string filePath)
{
string method = HttpUtility.UrlEncode("put document:14.0.2.5420");
string serviceName = HttpUtility.UrlEncode(siteUrl);
string document = HttpUtility.UrlEncode(libraryName + "/" + IO.Path.GetFileName(filePath));
string metaInfo = string.Empty;
string putOption = "overwrite";
string keepCheckedOutOption = "false";
string putComment = string.Empty;
string result = string.Empty;

string fpRPCCallStr = "method={0}&service_name={1}&document=[document_name={2};meta_info=[{3}]]&put_option={4}&comment={5}&keep_checked_out={6}";
fpRPCCallStr = String.Format(fpRPCCallStr, method, serviceName, document, metaInfo, putOption, putComment, keepCheckedOutOption);

byte[] fpRPCCall = System.Text.Encoding.UTF8.GetBytes(fpRPCCallStr + "\n");
byte[] postData = IO.File.ReadAllBytes(filePath);
byte[] data;

if (postData != null && postData.Length > 0)
{
data = new byte[fpRPCCall.Length + postData.Length];
fpRPCCall.CopyTo(data, 0);
postData.CopyTo(data, fpRPCCall.Length);
}
else
{
data = new byte[fpRPCCall.Length];
fpRPCCall.CopyTo(data, 0);
}

HttpWebRequest wReq = WebRequest.Create(siteUrl + "/_vti_bin/_vti_aut/author.dll" ) as HttpWebRequest;
SharePointOnlineCredentials credentials = Utils.GetO365Credentials("your login", "your password");
wReq.Credentials = credentials;
wReq.CookieContainer = Utils.GetO365CookieContainer(credentials, siteUrl);
wReq.Method="POST";
wReq.Timeout = 1000000;
wReq.ContentType="application/x-vermeer-urlencoded";
wReq.Headers.Add("X-Vermeer-Content-Type", "application/x-vermeer-urlencoded");
wReq.ContentLength=data.Length;

using (IO.Stream requestStream = wReq.GetRequestStream())
{
int chunkSize = 2097152;
int tailSize;
int chunkNum = Math.DivRem(data.Length, chunkSize, out tailSize);

for (int i = 0; i < chunkNum; i++)
{
requestStream.Write(data, chunkSize * i, chunkSize);
}

if (tailSize > 0)
requestStream.Write(data, chunkSize * chunkNum, tailSize);

}

WebResponse wresp = wReq.GetResponse();
using (IO.StreamReader sr = new IO.StreamReader(wresp.GetResponseStream()))
{
result = sr.ReadToEnd();
}

}

Three Ways of Uploading Large Documents to SharePoint Online


All of the above code examples are good ways to upload large documents to SharePoint Online. All of them utilize the Client Object Model to create the credentials and cookie that is required for SharePoint Online. Getting the cookie is rather complicated without using the Client Object Model. All three methods require that you set the request timeout to a large value because uploading to SharePoint Online is much slower than SharePoint On-Premises. Experiment with the code samples. I tested these with 200mb files and the CSOM was the fastest but your results may vary. I like variety and having multiple ways of accomplishing a task.

Thursday, July 24, 2014

Microsoft SharePoint Server MVP 2014

Technorati Tags: ,

I was very happy to find out earlier this month that I was awarded my 6th Microsoft SharePoint MVP award. It is an honor to be included with such a passionate group of people. I never get tired of hearing about the perseverance, curiosity and commitment of the SharePoint community to help others understand and excel at using the SharePoint platform. Many successful businesses have been built on top of SharePoint and even with the shift to O365 many more will be built. To me its all about learning, understanding and improving. I like putting the MVP awards next to my favorite poster of Steve Prefontaine’s quote “To give anything less than your best is to sacrifice the gift”. I like this picture because sometimes it feels like a race to stay ahead of all the changes. You also need endurance to overcome the frustration of software development. But most of all its the feeling of exhilaration when you have created something that works well. The people in the SharePoint community are giving their best, day in and day out.

Thursday, June 26, 2014

SharePoint 2013 ClientPeoplePicker Using REST

One of the benefits of using the SPRemoteAPIExplorer extension  is you can run across functionality that you did not know existed in the SharePoint REST API. Many developers use CSOM/JSOM to implement the PeoplePicker in their applications.  Both Richard diZerega’s  Real World Apps for SharePoint 2013 and Jeremy Thake’s  Using Multiple PeoplePickers in SharePoint 2013 Hosted Apps with AngularJS are great articles explaining how to do this using JSOM.  Many developers have asked if there is a simpler way of implementing a PeoplePicker without having to load the dependent JavaScript files.  This has been difficult with provider hosted apps since by default it does not include  an app web. You can get a sample of how to add  the people picker control to a provider hosted app from the Office App Model Samples v2.0 in the Components\Core.PeoplePicker folder AMS App Model Samples.  There is also the experimental office widget that implements a people picker control for provider hosted apps Widgets for Provider Hosted Apps. The good news is that you can implement your own people picker using the “_api/SP.UI.ApplicationPages.ClientPeoplePickerWebServiceInterface.clientPeoplePickerSearchUser” endpoint along with jquery-UI. It does not require having to load any of the dependent js files and makes it very easy to implement multiple people pickers. In this post I will show you sample code on how you can set up one ajax rest function to service mulitple jquery-ui autocomplete text boxes. The endpoint gives you maximum flexibility on how to control the searching for users and I will explain what each parameter means.

Picking Apart the People Picker

The above shows two jquery-ui  autocomplete text boxes both using the same function to suggest people. The first box is configured to allow suggesting users and groups and the second one only allows suggesting users.  This was easy to implement by just adding two input elements to page and then in the javascript attaching the function to do the search using jquery-ui.

$(document).ready(function () {
$("#txtPeoplePicker").autocomplete({
source: search,
minLength: 2
});
$("#txtPeoplePicker2").autocomplete({
source: search,
minLength: 2
});
});

The code below shows the search function that is called which is using the REST API to get the suggestions. Note that I added a principalType attribute to each html input element to allow changing the behavior of the of what is returned. You can add as many attributes you want and use them in your function to change any of the query parameters.

function search(request,response) {
var appweburl = decodeURIComponent(getQueryStringParameter('SPAppWebUrl'));
var hostweburl = decodeURIComponent(getQueryStringParameter('SPHostUrl'));

var restSource = appweburl + "/_api/SP.UI.ApplicationPages.ClientPeoplePickerWebServiceInterface.clientPeoplePickerSearchUser";
var principalType = this.element[0].getAttribute('principalType');
$.ajax(
{
'url':restSource,
'method':'POST',
'data':JSON.stringify({
'queryParams':{
'__metadata':{
'type':'SP.UI.ApplicationPages.ClientPeoplePickerQueryParameters'
},
'AllowEmailAddresses':true,
'AllowMultipleEntities':false,
'AllUrlZones':false,
'MaximumEntitySuggestions':50,
'PrincipalSource':15,
'PrincipalType': principalType,
'QueryString':request.term
//'Required':false,
//'SharePointGroupID':null,
//'UrlZone':null,
//'UrlZoneSpecified':false,
//'Web':null,
//'WebApplicationID':null
}
}),
'headers':{
'accept':'application/json;odata=verbose',
'content-type':'application/json;odata=verbose',
'X-RequestDigest':requestDigest
},
'success':function (data) {
var d = data;
var results = JSON.parse(data.d.ClientPeoplePickerSearchUser);
if (results.length > 0) {
response($.map(results, function (item) {
return {label:item.DisplayText,value:item.DisplayText}
}));
}
},
'error':function (err) {
alert(JSON.stringify(err));
}
}
);


}

Working with the response


Unfortunately, the response from the REST call is a string. Typically, all the REST responses in SharePoint will return objects as entities and complex types. In this case the object is a string. At first I thought I was going to have to use the context.parseJSONObject call from CSOM but you can just use JSON.parse and it will create the JSON object array. The response is undocumented. I am hoping Microsoft will expose this within the EDM model in future versions. I already voted for this on user voice UserVoice. Below is an example of what is returned.


Element number 5 is a user and Element 6 represents a SharePoint group. Note the EntityData is different.  The code just uses the DisplayText property to set both the return label and value used by jquery-ui.


What about all those parameters?


The REST API gives you many options to affect the results  a search using the ClientPeoplePickerQueryParameters object. Trying to figure out how these parameters affected searching  was daunting. Many of the parameters only apply to the people picker control but you can use them when implementing them with your own control. I will try to explain each.

AllowEmailAddresses: This is for the people picker control  and allows valid email addresses to be resolved and used as values. It has no effect on the search.

AllowMultipleEntities: This for the people picker control and allows for entering multiple users or groups. It has no effect on the search.


AllUrlZones: Only affects the search if you have set the WebApplicationID. It search across all UrlZones for that particular web application.


MaximumEntitySuggestions: Basically a row limit of how many users or groups are returned.


PrincipalSource: What sources you wish to search. Choices are  All - 15 , Membership Provider - 4 , RoleProvider - 8, UserInfoList - 1  or Windows - 2. These values can be combined.


PrincipalType: Controls the type of entities that are returned in the results. Choices are All - 15, Distribution List - 2 , Security Groups - 4,  SharePoint Groups – 8, User – 1. These values can be combined.


QueryString: The term to search


Required: This is for the people picker control and makes the field required. It has no effect on the search


SharePointGroupID: An integer representing the group ID you want to limit your search to. Only works if you set the Web parameter also which cannot be done via REST.


UrlZone: Limits the search to certain zones within the web application. Can only be used if the UrlZoneSpecified  parameter is set to true. Choices are Custom - 3, Default - 0, Extranet - 4, Internet – 2, IntraNet – 1. These values can be combined.


UrlZoneSpecified: Sets whether you are limiting your search to a particular URL zone in the web application.


Web: If set it works in conjunction with the SharePointGroupID parameter.


WebApplicaitonID: String value representing the Guid of the web application you want to limit your search to.


Easy PeoplePicker Functionality Using REST


Using the SharePoint REST API makes it easy to implement people picking. No need to struggle with the loading of dependent JavaScript files and you get better control over the behavior of the people searching. Finally you can easily use one function to service as many html inputs as you want.

Wednesday, June 4, 2014

Understanding SharePoint 2013 REST API Responses

Technorati Tags: ,,,,

I have been using the SPRemoteAPIExplorer Visual Studio Extension a lot. It has been a great help in understanding what inputs are required when making endpoint calls. Of course it is incredibly easy to generate the actual jQuery code with the new 2.0 feature.  However, something was missing. When I started using REST the more I discovered that the responses sent back were difficult to navigate. It took multiple steps to visualize what the responses looked like using either the browser developer tools or the new Visual Studio JSON visualizer. This was slowing down my development. It would be nice to know what to expect from a REST call so I could write the code to get what I wanted. The MSDN documentation is getting better but the response documentation is sparse, or the JSON shown is hard to understand. So to make my REST development much more productive I decided to add the responses for remote calls to the SPRemoteAPIExplorer in version 2.5. I also added the ability to copy the JSON path from a response to so you can copy it directly into your code. Having to remember the deeply nested JSON path of a response property can be daunting and error prone since the JSON path is case sensitive. For example, the REST response from the postquery method when searching returns an undocumented complex type. This type has many nested complex types. Trying to figure out where or if the data in a response exists could be an hour long web search or a lot of stepping through code and using visualizers. This can be much easier.


Copy the JSON Path

You can right click on any part of a response and select the “Copy Response Path” menu item. This will generate the JSON path to be used in your code. This feature is immensely helpful if you don’t know the rules of how different response types are returned. For example all “multivalue” types are returned as object arrays in JavaScript. The items are always included in an array named “results”.  Multivalued types include “Feeds”, “Arrays” and “Collections”. All three of these types are possible responses in the SharePoint Remote API.  Another unknown rule when getting JSON responses is that the method name is included in the JSON when the response is either a complex type or a primitive type. The example below shows that the “postquery” method name is appended because it returns a complex type.

Here is the output:

data.d.postquery.PrimaryQueryResult.RefinementResults.Refiners.results[0].Entries.results[0].RefinementCount

REST Response Types

Rest responses come in three flavors. Below are the icons used to display them in the response. Each type has a corresponding “multivalued” icon.

Primitives of course are string, integers, boolean and date. Complex types are types that are not defined in the entity model but are used as parameters to methods or returned in responses. Entities are the entities defined in the SharePoint Remote API model and can have both properties and methods. Entities returned as arrays or collections are considered feeds. When expanding any of the multivalued type icons you will see the properties of the underlying child item and not the properties of the collection itself.

The Complexity of Responses

As you use this tool you will discover that complex types can be embedded in entities. Many of the complex types are undocumented and internal within the object model. This tool will give you 99% reliable and accurate information on how to use and consume the SharePoint Remote API.  The other 1% like a “DataTable” in the Table property of a RelevantResult returned by search are hard coded and are not exposed. I am working on fixing that. In the meantime, with this release I have also fixed the generation of $ajax jQuery calls for methods that are tagged as “IntrinsicRestFul”. These method types were discussed in a previous post. Intrinsic RestFul. SPRemoteAPIExplorer has made my REST API coding incredibly productive. With the new Response and Response Path features it should be even easier for you.

Sunday, April 27, 2014

Uploading Documents and Setting Metadata Using SharePoint REST (One Version)

Technorati Tags: ,,

There are many examples of uploading documents using SharePoint 2013 REST/CSOM/JSOM and there are many issues. One issue is uploading documents into SharePoint Online with CSOM/JSOM. There is a 1.5mb limit. I work for a SharePoint ECM company and we have many customers that have documents much larger than 1.5mb. One way around this limitation is to use the SharePoint REST API which is limited  to 2gb. Just remember that REST requires you to post a byte array, and does not support reading from a stream. This can put a strain on memory resources.

Another issue is customers have versioning turned on and will complain that your solution creates two versions when uploading documents and setting metadata. This has always been a challenge when using SharePoint’s remote API. You can still use RPC which enables you to post the binary and the metadata in one call and only create one version. However, this can only be used from native apps and is limited to 50mb. You can upload and create only one version with CSOM/JSOM/REST by checking out the file before setting the metadata and then checking the file back in afterwards using the SPCheckinType.OverwriteCheckin. This works. However, if you try to check the file in and any field level validation fails, the check in fails. JavaScript code below.

function addFile() {   

getFileBuffer().done(function (result) {
upload(result.filename,result.content).done(function (data) {
var file = data.d;
checkOut(file.ServerRelativeUrl).done(function () {
updateMetadata(file.ServerRelativeUrl, null).done(function () {
checkIn(file.ServerRelativeUrl).done(function () { });
})
})

})
}).fail(function (err) {
var e = err;
});
}

function getFileBuffer() {
var file = $('#documentUpload')[0].files[0];
var fileName = file.name;
var dfd = $.Deferred();
var reader = new FileReader();

reader.onloadend = function (e) {
var result = { 'filename': fileName, 'content': e.target.result };
dfd.resolve(result);
}
reader.onerror = function (e) {
dfd.reject(e.target.error);
}

reader.readAsArrayBuffer(file);
return dfd;
}

function upload(filename, content) {
appweburl = decodeURIComponent(getQueryStringParameter('SPAppWebUrl'));
hostweburl = decodeURIComponent(getQueryStringParameter('SPHostUrl'));
var restSource = appweburl +
"/_api/SP.AppContextSite(@target)/web/lists/getbytitle('Documents')/rootfolder/files/add(url='" + filename + "',overwrite=true)?@target='" + hostweburl + "'";
var dfd = $.Deferred();

$.ajax(
{
'url': restSource,
'method': 'POST',
'data': content,
processData: false,
'headers': {
'accept': 'application/json;odata=verbose',
'X-RequestDigest': $('#__REQUESTDIGEST').val(),
"content-length": content.byteLength
},
'success': function (data) {
var d = data;
dfd.resolve(d);
},
'error': function (err) {
dfd.reject(err);
}
}
);

return dfd;
}
function checkOut(fileUrl) {
appweburl = decodeURIComponent(getQueryStringParameter('SPAppWebUrl'));
hostweburl = decodeURIComponent(getQueryStringParameter('SPHostUrl'));
var restSource = appweburl +
"/_api/SP.AppContextSite(@target)/web/lists/getbytitle('Documents')/rootfolder/files/getbyurl(url='" + fileUrl + "')/checkout?@target='" + hostweburl + "'";
var dfd = $.Deferred();
$.ajax(
{
'url': restSource,
'method': 'POST',
'headers': {
'accept': 'application/json;odata=verbose',
'content-type': 'application/json;odata=verbose',
'X-RequestDigest': $('#__REQUESTDIGEST').val()
},
'success': function (data) {
var d = data;
dfd.resolve(data.d);
},
'error': function (err) {
dfd.reject(err);
}
}
);

return dfd;

}
function updateMetadata(fileUrl) {

appweburl = decodeURIComponent(getQueryStringParameter('SPAppWebUrl'));
hostweburl = decodeURIComponent(getQueryStringParameter('SPHostUrl'));
var restSource = appweburl +
"/_api/SP.AppContextSite(@target)/web/lists/getbytitle('Documents')/rootfolder/files/getbyurl(url='" + fileUrl + "')/listitemallfields?@target='" + hostweburl + "'";
var dfd = $.Deferred();

$.ajax(
{
'url': restSource,
'method': 'POST',
'data': JSON.stringify({
'__metadata': {'type':'SP.ListItem'},
'Title': 'My Title 3'
}),
'headers': {
'accept': 'application/json;odata=verbose',
'content-type': 'application/json;odata=verbose',
'X-RequestDigest': $('#__REQUESTDIGEST').val(),
'X-Http-Method': 'PATCH',
"If-Match": "*"
},
'success': function (data) {
var d = data;
dfd.resolve();
},
'error': function (err) {
dfd.reject();
}
}
);

return dfd;

}
function checkIn(fileUrl) {
appweburl = decodeURIComponent(getQueryStringParameter('SPAppWebUrl'));
hostweburl = decodeURIComponent(getQueryStringParameter('SPHostUrl'));
var restSource = appweburl +
"/_api/SP.AppContextSite(@target)/web/lists/getbytitle('Documents')/rootfolder/files/getbyurl(url='" + fileUrl + "')/checkin?@target='" + hostweburl + "'";
var dfd = $.Deferred();

$.ajax(
{
'url': restSource,
'method': 'POST',
data: JSON.stringify({
'checkInType': 2,
'comment': 'whatever'
}),
'headers': {
'accept': 'application/json;odata=verbose',
'content-type': 'application/json;odata=verbose',
'X-RequestDigest': $('#__REQUESTDIGEST').val()
},
'success': function (data) {
var d = data;
dfd.resolve(data.d);
},
'error': function (err) {
dfd.reject(err);
}
}
);

return dfd;

}

Use the ValidateUpdateListItem Method


If your going to be setting or updating metadata using the SharePoint’s remote API, then I suggest you use the SP.ListItem’s new ValidateUpdateListItem method. This method is available only through the remote API and is new to SP2013. ValidateUpdateListItem  is very similar to the UpdateOverwriteVersion method available on the server API. ValidateUpdateListItem sets the metdata and if the bNewDocumentUpdate argument is set to true will call the UpdateOverwriteVersion method which will update without incrementing the version. This eliminates the need to make the extra calls to check out and check in the document. It also will check in the document if it is already checked out and use the checkInComment argument.  The method takes multiple SP.ListItemFormUpdateValue types as arguments. This type takes the internal name of the field along with a value.

function updateMetadataNoVersion(fileUrl) {
appweburl = decodeURIComponent(getQueryStringParameter('SPAppWebUrl'));
hostweburl = decodeURIComponent(getQueryStringParameter('SPHostUrl'));
var restSource = appweburl +
"/_api/SP.AppContextSite(@target)/web/lists/getbytitle('Documents')/rootfolder/files/getbyurl(url='" + fileUrl+ "')/listitemallfields/validateupdatelistitem?@target='" + hostweburl + "'";

var dfd = $.Deferred();

$.ajax(
{
'url': restSource,
'method': 'POST',
'data': JSON.stringify({
'formValues': [
{
'__metadata': { 'type': 'SP.ListItemFormUpdateValue' },
'FieldName': 'Title',
'FieldValue': 'My Title2'
},
{
'__metadata': { 'type': 'SP.ListItemFormUpdateValue' },
'FieldName': 'testautodate',
'FieldValue': 'asdfsdfsdf'
}
],
'bNewDocumentUpdate': true,
'checkInComment': ''
}),
'headers': {
'accept': 'application/json;odata=verbose',
'content-type': 'application/json;odata=verbose',
'X-RequestDigest': $('#__REQUESTDIGEST').val()
},
'success': function (data) {
var d = data;
dfd.resolve(d);
},
'error': function (err) {
dfd.reject(err);
}
}
);

return dfd;
}

The efficiency of this method is reflected in its return type which is a list of SP.ListItemFormUpdateValue . This type contains the validation response for each field being updated. You can use the ListItemFormUpdateValue.HasException property to check for errors then use the ErrorMessage property to log or inform the user.


I Prefer ValidateUpdateListItem


Below is the revised code of adding a file using the ValidateUpdateListItem method.

function addFile() {   

getFileBuffer().done(function (result) {
upload(result.filename,result.content).done(function (data) {
var file = data.d;
updateMetadataNoVersion(file.ServerRelativeUrl).done(function () {

})
})
}).fail(function (err) {
var e = err;
});
}

The ValidateUpdateListItem method eliminates extra remote calls and allows you to handle multiple validation errors. Using this method along with REST you can efficiently upload a document up to 2gb and create only one version. You can also use this method to update metadata without having to create new file. Just set the bNewDocumentUpdate argument to true and this will not increment the version.

Saturday, April 19, 2014

Using SharePoint 2013 REST API To Check User Permissions

Technorati Tags: ,,

Recently I have been working on a JavaScript app model project where I wanted to check the current user’s permissions within the site and on a particular list. As always I strive to use the SharePoint REST API when ever I can. So I looked at the the DoesUserHavePermissions method of the SPWeb. I used the SPRemoteAPIExplorer extension to look up this method to see what was needed to call it using REST. Version 2.0 now exposes complex types and the SP.BasePermissions type is used as an argument to this method. I wanted to check if the user had the ability to edit list items on the web. Looking at the generated ajax REST code from SPRemoteAPIExplorer I noticed it had two properties, High an Low. Since the SP.BasePermissions type is a flags type enumeration where you can combine permissions, these two properties represent the high order 32 bit integer and the low order 32 bit integer to a 64 bit integer representing the permission. The problem was how would I determine the high and low order of a given enumeration in JavaScript?

I wanted to avoid using JSOM and do everything with REST. Fortunately, I understand that you must rely on JSOM for certain things. In this case JSOM has the SP.BasePermissions type with methods for combining sets of permissions. This type is defined in SP.js. JSOM also exposes the types of permissions as a basic integer enumeration as SP.PermissionKind. This enumeration is defined in SP.Runtime.js.  I still could not figure out how to get the high an low values for the permission. I knew what the values were supposed to be for the EditLisitItems permission. Looking at the permission in debug view I noticed the values were exposed by the typical nonsensical property names $4_1 and $5_1 . When ever you set the permission with a permission kind the JSOM function will bit shift the values and re-calculate the high and low values.

The final thing to note is that even though the high and low values are 32 bit integers they must be sent as strings, otherwise you will get an error stating that it could not convert the primitive value to a EDM.Int64. The SharePoint REST processor expects these a strings when converting to a 64 bit integer. Why?  JavaScript does not support 64 bit integers and thus anything in a JSON payload would always be expected to be a string.  This is why when dealing with entities that represent 64 bit integers the JavaScript model will typically have a High and Low property. Mozilla has an example of something similar to SP.BasePermissions with its UInt64 type js-ctypes.

An example of a successful REST call to DoesUserHavePermissions :

function getUserWebPermissionREST() {
var hostweburl = decodeURIComponent(getQueryStringParameter('SPHostUrl'));
var appweburl = decodeURIComponent(getQueryStringParameter("SPAppWebUrl"));
var restSource = appweburl + "/_api/web/doesuserhavepermissions";

//still need jsom to get high order and low order numbers of a permission
var perm = new SP.BasePermissions();
perm.set(SP.PermissionKind.editListItems);

$.ajax(
{
'url': restSource,
'method': 'POST',
'data': JSON.stringify({
'permissionMask': {
'__metadata': {
'type': 'SP.BasePermissions'
},
'High': perm.$4_1.toString(),
'Low': perm.$5_1.toString()
}
}),
'headers': {
'accept': 'application/json;odata=verbose',
'content-type': 'application/json;odata=verbose',
'X-RequestDigest': $('#__REQUESTDIGEST').val()
},
'success': function (data) {
var d = data.d.DoesUserHavePermissions;
},
'error': function (err) {
alert(JSON.stringify(err));
}
}
);
}

No matter how hard you try you still need to use JSOM


Trying to do everything using SharePoint REST is very difficult. When dealing with permissions it is much easier to leverage the built-in JSOM enumerations and SP.BasePermissions type rather than tying to replicate the same logic in your own libraries.  Also if your doing app model development you will need to use the SP.AppContextSite to get the context of the host web. So when doing app model development use REST as much as possible and use common sense when to use JSOM.  I hope this post helps you understand the reasoning for the SP.BasePermissions structure and its methods and why SharePoint REST uses a high and low property to represent a 64 bit integer for permissions. It would be nice if Microsoft would put actual friendly names around the $4_1 and $5_1 properties. 

Wednesday, April 9, 2014

Generate SharePoint 2013 REST Code with SPRemoteAPIExplorer 2.0

Technorati Tags: ,,,,

One of the biggest road blocks for developers trying to learn the SharePoint 2013 REST API is the elusive complex type. Complex types are types that are used by the REST API to receive data as arguments from the client and to send data back to the client as a response. As a SharePoint developer you know and “love” these  types by there JSON signature of {‘_metadata’:{type: SP.Whatever},…}. Having to figure these type names and what properties are available is a constant struggle. The complex type are not the same as entity types returned from libraries, lists and feeds but are typically used in API calls to do such things are create sub-sites or social posts. Complex types are named appropriately because they can be complex.

Here are some quick facts about complex types. There are 154 complex types defined in the REST API not all of which can be used by REST.  There are 22 complex types which contain nested complex types. For example, the SP.Social.SocialRestPostCreationData complex type used to create a social post contains 5 nested complex types.  There are 7 complex collection types which contain complex child item types. These collection complex types have a different JSON signature than complex types.  Finally of the 154 complex types 68 are marked as either internal or private making them impossible to discover without the use of a reflection tool. The new $metadata schema information available in SP1 for the REST API is useful but does not give you any clues on how to construct the complex type in a POST. All of these facts make the SharePoint 2013 REST API difficult to learn and use.

SPRemoteAPIExplorer -- Visual Studio Gallery

SPRemoteAPIExplorer 2.0 Supports Discovery of REST Complex Types

In the previous version of SPRemoteAPIExplorer you could not see what properties were contained in the complex type if it was being used as a parameter to a method call. With version 2.0 you can now see complex types marked with a different icon in the explorer. You can expand it and see the properties contained within. The same information available for non-complex parameters is available such as whether it can be used in CSOM, JSOM or Managed Code.

As you can see the this complex type has many nested complex types. So how can you easily create this type in JSON and post it in the REST call?

Generate REST calls with SPRemoteAPIExplorer 2.0

Version 2.0 supports right clicking on the method and selecting the “Create $ajax call” menu item.

This will create a jQuery $.ajax code snippet and copy the code to the clipboard. The code will contain the JSON payload definition for the post setting the values to null. There is no need to lookup the type names and manage all the nesting. Also SPRemoteExplorer will also add proper syntax for multi- value properties and collection complex types. Below is the code that is generated. You can paste this into your javascript and start testing the call.

 ///method: Post resource: SP.Social.SocialRestFeed
$.ajax(
{
'url': 'restSource',
'method': 'POST',
'data': JSON.stringify({
'restCreationData': {
'__metadata': {
'type': 'SP.Social.SocialRestPostCreationData'
},
'ID': null,
'creationData': {
'__metadata': {
'type': 'SP.Social.SocialPostCreationData'
},
'Attachment': {
'__metadata': {
'type': 'SP.Social.SocialAttachment'
},
'AttachmentKind': null,
'ClickAction': {
'__metadata': {
'type': 'SP.Social.SocialAttachmentAction'
},
'ActionKind': null,
'ActionUri': null
},
'ContentUri': null,
'Description': null,
'Height': null,
'Length': null,
'Name': null,
'PreviewUri': null,
'Uri': null,
'Width': null
},
'ContentItems': { 'results': [''] },
'ContentText': null,
'DefinitionData': {
'__metadata': {
'type': 'SP.Social.SocialPostDefinitionData'
},
'Items': { 'results': [''] },
'Name': null
},
'SecurityUris': { 'results': [''] },
'Source': {
'__metadata': {
'type': 'SP.Social.SocialLink'
},
'Text': null,
'Uri': null
},
'UpdateStatusText': null
}
}
}),
'headers': {
'accept': 'application/json;odata=verbose',
'content-type': 'application/json;odata=verbose',
'X-RequestDigest': $('#__REQUESTDIGEST').val()
},
'success': function (data) {
var d = data;
},
'error': function (err) {
alert(JSON.stringify(err));
}
}
);

Sometimes you may only want to get the complex type JSON representation. This can be accomplished by right clicking on a complex type node and selecting the “Create JSON” menu item.  This will copy the JSON to the clipboard.


No more searching for SharePoint 2013 REST code samples


SPRemoteAPIExplorer 2.0 should save you a lot of time searching for code samples on how to call many of the undocumented REST methods. The new code generation feature should make it easier to test the capabilities of the API. It will give you a chance to test this tool out also. I purposely allowed the REST code to be generated on methods that are marked as not supporting REST. This way you can test the validity  of this assertion. You will find that even though the method is marked as supporting REST, if one of the parameter’s “OData Type” property is marked as Invalid, then the REST call will fail.  I have developed this tool and SPFastDeploy to make SharePoint Online development quicker and easier. I hope you find some usefulness from this tool and please feel free to suggest improvements either here or on the Visual Studio Gallery Q/A section.

Saturday, March 15, 2014

SharePoint 2013 App Model Development Just Became Easier

Technorati Tags: ,,,,

SPFastDeploy the Visual Studio extension for deploying code to SharePoint App Model solutions has been updated. Version 3.0 now has a deploy on save option which will deploy code changes directly to SharePoint or O365 hosted applications when saving your changes. In previous versions you had to right click the “Fast Deploy…” context menu item of the file you wanted to deploy. This feature has been asked for by numerous people. No longer will you have to keep track of which files changed and right click on each to deploy.

SPFastDeploy Version 3.0

Deploy On Save Option

SPFastDeploy version 3.0 allows to set the “DeployOnSave” option to true using the Visual Studio options.

When using the Deploy On Save feature the status of the deployment will be displayed in the debug output window after clicking on the save button in Visual Studio.

If you save a file in folder that does not exist yet you see the error in the output below.

If you save a file that has a build action other than content you will get the output below. The file still saves  but you just get this message.

Typescript Support

I know many are using this extension with typescript app solutions. I am using typescript myself especially on large java script projects. Supporting the deployment after saving a change to a typescript file proved to be difficult. The deploy on save feature supports deployment of the corresponding java script file only if one of the Typescript “Compile on Save” options are checked. If it is not checked you will  get a message in the debug output window stating that Fast deploy timed out waiting for the compiler to complete.

Currently, SPFastDeploy will wait 30 seconds for the java script to be generated. If you have very large typescript projects this may not be long enough since typescript will recompile every file. You can set the “TypeScriptCompileTimeOut” interval in the options to something longer. The interval is in seconds. If the deployment is successful you will see the output below.

Auto Detect App Deployment Target Change Support

Another feature requested was the detection of a change in the deployment target of an app model solution. Many times you are making changes and testing on your own O365 development site and then want to move your development to a corporate development site. In previous versions you had to save your project and restart Visual Studio for the change to be detected by SPFastDeploy. Version 3 now handles this event so when you change your deployment target SPFastDeploy will deploy to the correct target. It will also detect if it is O365 and ask for credentials. Version 3 also automatically keeps the O365 cookie so you will no longer have to select the option on the login screen to keep your self logged in.

Making it Easier to Develop in the Cloud App Model

SPFastDeploy has saved me many hours of development time by giving me the ability to make code changes and see the changes quickly. The new deploy on save feature instantly deploys the changes. If you still like the old way just turn off the option and use the context menu item. Possibly some day we can deploy the change, launch the browser, refresh the cache, and have the break points in Visual Studio show up in the browser dev tools debugger and step right into the code, without having to do a complete or F5 deployment.

Friday, January 31, 2014

SPRemoteAPIExplorer Visual Studio Extension Updated (Version 1.1)

Technorati Tags: ,,,,

Last month I announced the new SPRemoteAPIExplorer Visual Studio extension which enables you to determine what classes, methods and properties are available when using  the SharePoint REST, CSOM and JSOM API. The extension makes it easy to see what methods are available across the four different flavors (Managed, Silverlight, Javascript, REST) of the SharePoint 2013 remote API SPRemoteAPIExplorer. In this post I will tell you about a few new features added to the extension to help clear up some confusion with how Microsoft implements this REST API. The confusion arises from the fact that some methods cannot be called by name when using REST. Microsoft labels these types of methods as “IntrinsicRestful”. I will try to explain the purpose around these types of methods and how the extension can help you use them.  Another problem with the REST API is that some methods are allowed to be called but there parameters are not OData compatible.  Finally, I will explain the usefulness of the new method property “ServerName” and how it can help you POST objects with REST.

What exactly is “InstrinsicRestful” and why is it there in the REST API?

Below is a picture of SPRemoteAPIExplorer displaying the properties of the Create method of the Microsoft.SharePoint.SPListCollection. In version 1.1 the property grid will show a new property called “IntrinsicRestful”. If this is set to true then the method cannot be called using the URL endpoint resource. This is because the rest request processor assumes you are calling this method when ever you are posting to the collection resource.

Trying to call this method using a post like “http://servername/_api/web/lists/create” will result in a “resource not found error”.

An example of the correct way of calling this method is below.

function createList() {
hostweburl = decodeURIComponent(getQueryStringParameter('SPHostUrl'));
appweburl = decodeURIComponent(getQueryStringParameter('SPAppWebUrl'));
url = appweburl + "/_api/SP.AppContextSite(@target)/web/lists?@target='" + hostweburl + "'";

$.ajax({
url: url,
type: "POST",
data:JSON.stringify({
'__metadata': { 'type': 'SP.List' },
'BaseTemplate': 101,
'Description': 'Rest Created2',
'Title': 'RestDocuments2'
}),
headers: {
"accept": "application/json;odata=verbose",
"X-RequestDigest": $("#__REQUESTDIGEST").val(),
"X-Http-Method": "POST",
"content-type": "application/json;odata=verbose"
},
success: function (data) {
var d = JSON.parse(data.body);

},
error: function (err) {
alert(JSON.stringify(err));
}
});

}

The rest request processor determines this is a post to a SPListCollection then gets the intrinsic restful method Create and uses this method to send the data to the object model. The processor uses the “Create_Client”  method listed in the “ServerMethod” property to call on the SPListCollection object. Knowing what method is called on the object model side can be useful when you want to use a reflection tool to debug the code. (Yes you can step through Microsoft’s code—Future Post ).


Another thing to be aware of when using these types of methods is that the parameter types are not always accurate. Below SPRemoteAPIExplorer shows the properties for the “parameters” argument to the create method. The “Parameter Type” for this argument is listed as “Microsoft.SharePoint.SPListEntityData”. Normally you would use this as the “__metadata” parameter “{‘type’: ‘SP.SPListEntityData’}”. Unfortunately, this would never work since this type is not defined in any of the server stubs (model). It is defined in the server side object model and is used as the argument to the “Create_Client” method.  A rule of thumb when you encounter a “xxxEntityData”  parameter type is to just use the actual object type it creating, in this case SP.List. The properties are the same and the rest request processor just maps the json properties to the SPListEntityData object when calling the server object model.


So why does the REST API have “IntrinsicRestful” methods? My theory is for the support of batch operations. Many of the collections exposed in Microsoft.SharePoint have a “Create” method which is listed as “IntrinsicRestful”.


  • SPViewCollection
  • SPFieldLinkCollection
  • SPFieldCollection
  • SPGroupCollection
  • SPFolderCollection
  • SPListItemEntityCollection

It would be nice if the SharePoint REST API supported posting and creating multiple entities in one request. It would cut down on the number of requests and responses making it a much more scalable API. The humorous aspect of this is that the OData specification does support sending multiple entities as collections. OData Representiting JSON collections. Of course you may also know these as “feeds”. The SharePoint REST API does support sending of collections as arguments for things such as “Select Properties” in a search postQuery request.  As an experiment I attempted to send a collection of multiple SP.List entities in one call using the OData standard of using the “results” parameter.

function createMultipleLists() {
hostweburl = decodeURIComponent(getQueryStringParameter('SPHostUrl'));
appweburl = decodeURIComponent(getQueryStringParameter('SPAppWebUrl'));
url = appweburl + "/_api/SP.AppContextSite(@target)/web/lists?@target='" + hostweburl + "'";

var newLists = [];
newLists.push( {'__metadata': { 'type': 'SP.List' },
'BaseTemplate': 101,
'Description': 'Rest Created8',
'Title': 'RestDocuments8'});
newLists.push( {'__metadata': { 'type': 'SP.List' },
'BaseTemplate': 101,
'Description': 'Rest Created9',
'Title': 'RestDocuments9'});


$.ajax({
url: url,
type: "POST",
data: JSON.stringify({
'results': newLists,
"__count": "2"
}),
headers: {
"accept": "application/json;odata=verbose",
"X-RequestDigest": $("#__REQUESTDIGEST").val(),
"X-Http-Method": "POST",
"content-type": "application/json;odata=verbose"
},
success: function (data) {
var d = JSON.parse(data.body);

},
error: function (err) {
alert(JSON.stringify(err));
}
});

}

Of course this attempt failed with the error “argument found with no type defined”. This is due to the fact that the OData json deserializer used in the rest request processor will only look for a single entity. However, there is a “feed” type OData json deserializer which is used only internally by SharePoint when reading responses from BCS external sources.


OData Parameters Make a Big Difference for REST Support


Recently, I was trying to get REST to support web part configuration. Code below shows how to get a particular web part property using REST.

function getWebPartPropety(){
appweburl = decodeURIComponent(getQueryStringParameter('SPAppWebUrl'));
hostweburl = decodeURIComponent(getQueryStringParameter('SPHostUrl'));

var urlTemplate = appweburl + "/_api/SP.AppContextSite(@target)/web/getfilebyserverrelativeurl('/shared documents/forms/allitems.aspx')/GetLimitedWebPartManager(0)/webparts/getbyid('{f973f714-54bd-43bd-97d8-80ac6e70116e}')/webpart/properties?@target='" + hostweburl + "'";
$.ajax({
contentType: 'application/json',
url: urlTemplate,
type: "GET",
headers: {
"Accept": "application/json;odata=verbose",
"content-type": "application/json;odata=verbose",
"X-RequestDigest": $("#__REQUESTDIGEST").val()
},
success: function (data) {
var result = data.d.qID;
},
error: function (err) {
alert(JSON.stringify(err));
}
});

}

This works. So looking at the SPRemoteAPIExplorer I determined the the web part properties is a Microsoft.SharePoint.SPPropertyValues object. This object has a SetFieldValue method which is marked that it is supported by REST. Unfortunately it is not.

function saveWebPartProperties() {
appweburl = decodeURIComponent(getQueryStringParameter('SPAppWebUrl'));
hostweburl = decodeURIComponent(getQueryStringParameter('SPHostUrl'));
//setfield value cannot be invoked since the value parameter is invalid.
var urlTemplate = appweburl + "/_api/SP.AppContextSite(@target)/web/getfilebyserverrelativeurl('/shared documents/forms/allitems.aspx')/GetLimitedWebPartManager(0)/webparts/getbyid('{534b28c9-7186-4eef-ac7a-dbe2330e9c87}')/webpart/properties/setfieldvalue?@target='" + hostweburl + "'";
$.ajax({
contentType: 'application/json',
url: urlTemplate,
type: "POST",
data: JSON.stringify({
'fieldName': 'qID',
'value': '2'
}),
headers: {
"accept": "application/json;odata=verbose",
"content-type": "application/json;odata=verbose",
"X-HTTP-Method": "MERGE",
"X-RequestDigest": $("#__REQUESTDIGEST").val(),
"IF-MATCH": "*"
},
success: function (data) {
var result = data.d.results;
},
error: function (err) {
alert(JSON.stringify(err));
}
});


}

The problem with the “SetFieldValue” method not working is that the “value” parameter is marked as invalid. Using the SPRemoteAPIExplorer you can see that  the “OData Type” property is set to “Invalid”. Even if the server stub marks the method callable by REST, the rest request processor will still reject the call based on the fact that the “value” parameter is marked as an invalid OData Type.


So in version 1.1 of the SPRemoteAPIExplorer the extension will mark the method’s REST property to false if any of the method’s parameters have an invalid OData Type. This will save you a lot of time.


Knowledge of SharePoint’s REST API is Getting Better and Better


Version 1.1 of SPRemoteAPIExplorer adds features to help you understand the quirkiness of the SharePoint REST API. The intrinsic restful aspect of the API just adds to the confusion tempting developers with the hope of batch processing capabilities. I hope that Microsoft improves the the scalability of the API soon and implement what many REST services can support already. It would also be nice if the server stubs would designate methods as not callable from REST if any of the parameters are OData invalid. To allow the method to be called only to have an error be thrown on the parameter seems rather unproductive leading developers down confusing rabbit holes. Finally, as I use this extension more and more I continue to discover problems with the complex types used as parameters. The use of SPListEntityData as the type for creating a list and then having the rest request processor throw an error because it is not defined in the model leads developers to think such methods do not work. REST API requires developers to experiment and I hope this tool will help you do just that.  If there are features you would like to see added to this tool then please feel free to post your request here or on the Visual Studio Gallery.